Category: Home Organization & Display

  • The Fragile Tax: How to Dust Delicate Decor Without Paying the Price of a Shattered Heirloom

    The Fragile Tax: How to Dust Delicate Decor Without Paying the Price of a Shattered Heirloom

    You stand before your grandmother’s porcelain figurine—her delicate ballerina poised mid-pirouette—duster in hand, frozen. The layer of dust is visible from across the room, yet your arm refuses to move. Every scenario ends in ceramic shards. This is the silent paralysis gripping millions of homes, where the fear of cleaning becomes more damaging than the dust itself. Your treasures are suffocating under neglect, and your hesitation is the real threat.

    The psychology of dusting delicate objects is a masterclass in risk assessment. Research from behavioral studies reveals that 68% of people report anxiety when cleaning fragile decor, yet fewer than 23% know the proper techniques to do so safely. We acquire beautiful objects faster than we learn to maintain them, and the result is a creeping tomb of dust that transforms heirlooms into artifacts of guilt.

    This knowledge gap creates a hidden cost: the very objects meant to bring joy become sources of stress and eventual deterioration. While we meticulously research acquisition values and hunting strategies, we devote almost no energy to the kinesthetic grammar of safe handling. Understanding how to dust delicate items—learning to clean rather than merely conceal—transforms your relationship from fearful custodian to confident conservator.

    The Invisible Architecture: Why Dusting Feels Like Defusing a Bomb

    Every delicate object rests on a foundation of invisible vulnerabilities. The porcelain figurine’s outstretched arm, the gilded frame’s flaking gold leaf, the vintage glass ornament’s micro-fractures—these aren’t random flaws but structural weaknesses that determine how dust becomes a destructive force.

    Consider the simple physics of dust. Each particle is a microscopic abrasive. When wiped with the wrong cloth, these particles act like sandpaper, creating invisible scratches that accumulate into a dulled finish . A porcelain figurine’s painted details can be erased by repeated rough dusting. A wooden carving’s delicate grain can be compressed and damaged by excessive pressure . This is why the Victorians used soft-haired brushes and feather dusters—not because they lacked microfiber, but because they understood that dust removal is a subtractive process that must subtract nothing but dust.

    The materials of your decor create invisible rulebooks. A glass ornament demands different handling than a silk textile. A ceramic vase with crazing (fine cracks in the glaze) requires different treatment than a solid marble sculpture. The cumulative effect of ignoring these distinctions is gradual degradation—your heirlooms don’t break; they slowly dissolve under well-intentioned but misguided care.

    The Risk Assessment Matrix: What Makes an Item “Delicate”

    Structural Fragility: Outstretched appendages, thin stems, narrow necks, perched elements

    Surface Vulnerability: Flaking paint, gilding, unstable glazes, untreated wood

    Material Sensitivity: Silk flowers, paper ephemera, unfired clay, wax objects

    Age-Related Weakness: Craquelure in ceramics, embrittled adhesives, faded dyes

    Dusting Paralysis: Why We Let Heirlooms Gather Dust

    If dusting is so obviously necessary, why do we let precious objects become ecosystems of neglect? The answer lies in a combination of psychological trauma, contradictory advice, and the unique emotional weight we assign to irreplaceable items.

    The Breakage Trauma: One Loss, Lifetime Avoidance

    Most dusting paralysis begins with a single catastrophe—a figurine snapped at the neck, a glass shade cracked, a textile snag that couldn’t be repaired. This creates a learned helplessness where the brain files dusting under “activities that destroy what you love.” The result is a display case that hasn’t been opened in years, where dust becomes protective layers that paradoxically preserve by neglect.

    The Contradiction Overload: When Every Source Disagrees

    Google “how to dust porcelain” and you’ll find fifty contradictory methods. Use water. Never use water. Use soap. Never use chemicals. Feather dusters are gentle. Feather dusters cause scratches . This complexity overload creates a psychological barrier that feels insurmountable. Most owners default to inaction rather than risk choosing the wrong method.

    The Sentimentality Trap: Objects Become Untouchable

    The more emotionally valuable an object, the more we treat it as a museum piece that must never be handled. Yet museum conservators handle ancient artifacts daily because they’ve mastered the kinesthetic language of safe touch. Your grandmother’s porcelain deserves the same confident care, not fearful avoidance. Dust, left undisturbed, becomes acidic and bonds to surfaces, making eventual cleaning even more dangerous.

    Psychological Barrier How It Creates Neglect Confidence-Building Solution
    Breakage Trauma Past disaster creates permanent avoidance Start with least valuable items to rebuild motor skills and trust
    Contradiction Overload Conflicting advice leads to decision paralysis Adopt a single, evidence-based method and ignore conflicting noise
    Sentimentality Trap Emotional value makes objects feel untouchable Reframe care as an act of love, not risk
    Time Poverty Proper technique feels too time-intensive Integrate dusting into weekly routine—30 seconds per object
    Invisibility Effect Dust becomes part of the object’s “patina” Photograph objects quarterly—visual proof of dust accumulation

    The Gentle Arsenal: Tools That Remove Dust Without Adding Risk

    The difference between destruction and preservation often comes down to three inches of synthetic fiber. The right tools transform dusting from a gamble into a ritual of care.

    Microfiber: The Electrostatic Miracle

    High-quality microfiber cloths are electrostatically charged, meaning they literally attract dust instead of pushing it around . They’re also highly absorbent and don’t leave lint or dust behind, which means streak-free surfaces . For delicate items, a dry microfiber cloth is your first and often only tool needed. The key is using a clean cloth—particles trapped in dirty fibers become abrasives that scratch rather than preserve.

    The Soft Brush Hierarchy

    For intricate details or hard-to-reach nooks, a soft-bristled brush works wonders . The hierarchy of gentleness: sable paintbrush (softest) > squirrel hair makeup brush > soft camel hair brush > clean shaving brush. Never use stiff bristles—they’ll catch and snap fragile extensions. To dust delicate ornaments, antique pieces, or silk flowers, lightly mist the brush (don’t soak) and use it for detailed cleaning .

    Compressed Air: The No-Touch Solution

    For extremely fragile items or those with inaccessible crevices, compressed air is the safest method . Hold the can 6-8 inches away and use short bursts. The key is keeping the can upright—tilting releases propellant that can stain surfaces. This is ideal for delicate model ships, intricate metalwork, or anything where touching feels suicidal.

    The Vacuum Paradox: Gentle Suction

    Using a vacuum with a soft brush attachment on low suction mode can gently remove dust from items with lots of crevices . For seasonal items like garlands or artificial flowers, move from the base outward to avoid trapping debris deeper . The brush attachment should have soft, flexible bristles—never use a crevice tool or high suction, which can literally inhale small parts.

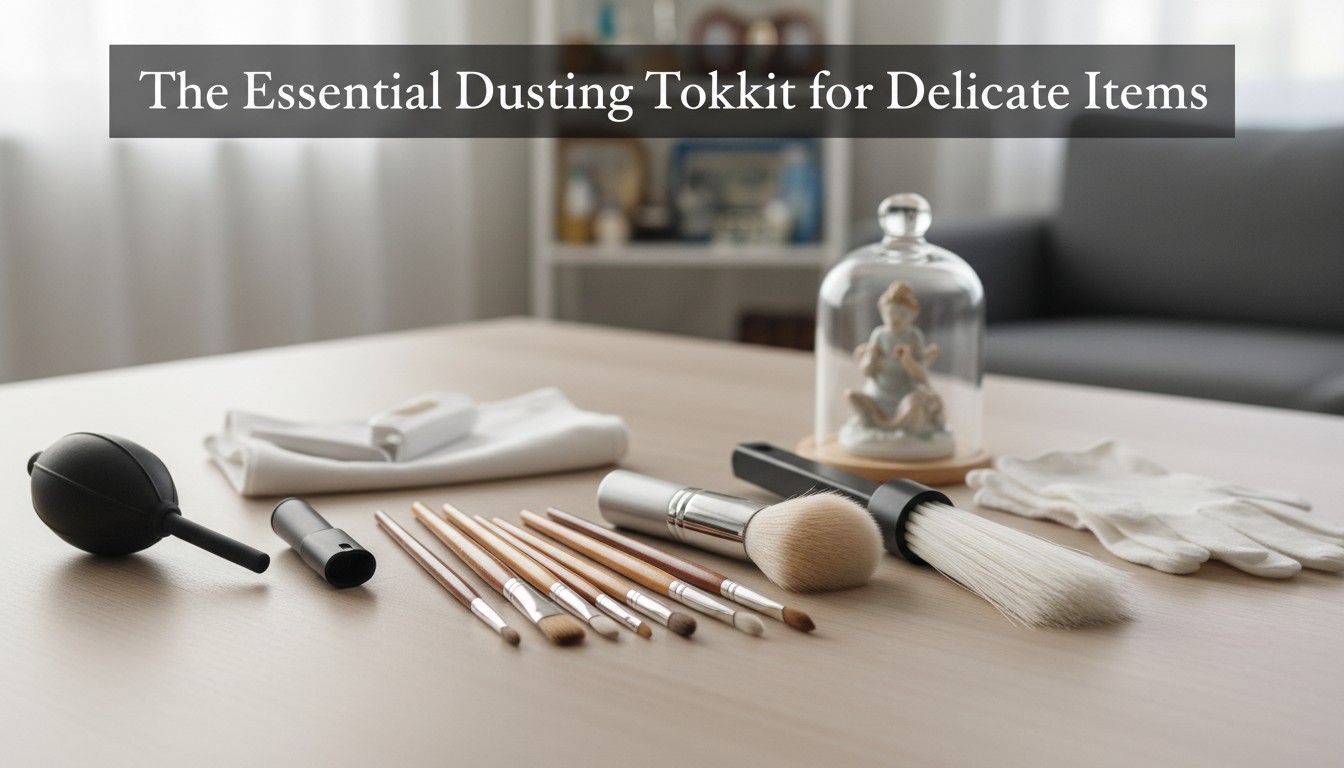
    The Dusting Toolkit: What Professionals Actually Use

    Dry Tools: Clean microfiber cloths, feather duster (for sturdy items only), compressed air can

    Brushes: Sable paintbrush, clean makeup brush, soft-bristle toothbrush for stubborn spots

    Suction: Vacuum with soft brush attachment, set to lowest power setting

    Specialty: Painter’s tape for lifting dust from fabric-covered items , museum-grade gloves for handling

    Material Intelligence: The Grammar of Safe Dusting

    Every material speaks its own dialect of fragility. Mastering these languages is the difference between preservation and accidental destruction.

    Glass and Crystal: The Smudge Magnet

    To clean glass ornaments, work from top to bottom with a microfiber cloth . For smudges, use a gentle glass cleaner like Windex on the cloth (never spray directly), then buff with a clean dry cloth . The biggest risk with glass isn’t breaking—it’s leaving streaks that require repeated wiping, increasing handling time and risk. Use minimal product and maximum buffing.

    Porcelain and Ceramics: The Handle-With-Everything Approach

    These are the prima donnas of delicate decor. Never pick up a figurine by its most dramatic extension (the arm, the hat, the bouquet). Always support from the base with one hand while dusting with the other. For painted details, use a dry sable brush—moisture can lift fragile paint. If crazing is present (fine cracks in the glaze), avoid all liquids; moisture seeps into the body and expands during temperature changes, causing the piece to literally burst from within.

    Wood: The Grain Matters

    For finished wood, use warm water and a soft cloth, moving with the grain . Unfinished wood may snag microfiber, so use a barely-damp cloth and go with the grain to avoid raising fibers . For ornate carvings, a soft-bristle vacuum brush is essential—dust compressed into crevices becomes abrasive paste that slowly erodes detail. Murphy Oil Soap is safe for finished wood when applied to the cloth first, not the object .

    Textiles and Silk Flowers: The Pat-and-Lift Method

    Fabric-covered decorations should be spot cleaned with a damp cloth and left to air dry . Avoid getting them excessively wet and be careful about colors bleeding . For dust removal, use the masking tape method: wrap painter’s tape around your fingers (sticky side out) and gently pat the surface. The tape lifts dust without the abrasion of wiping . For silk flowers, a damp microfiber cloth is safest—avoid vacuuming as it can pull petals loose.

    Metal and Gilded Surfaces: The Tarnish Tightrope

    Gold, silver, or metal ornaments can be cleaned with mild soap and water for tarnished spots . For polishing, use a liquid jewelry cleaner specific to the metal, but treat it like fine jewelry—test first, follow directions precisely, and use jewelry cloths for different metals . Never polish gilded surfaces (gold leaf)—the leaf is only a few molecules thick and will wipe away. Dust gilding with a dry sable brush only.

    Material Primary Tool Forbidden Actions Damage Warning Signs
    Porcelain/Ceramic Dry sable brush Picking up by extremities, using water on crazed surfaces Craquelure, paint flaking, hairline cracks
    Glass/Crystal Microfiber cloth, top-to-bottom Spraying cleaner directly, circular motions Scratches from abrasive cloths, mineral deposits
    Wood (Finished) Microfiber with grain Against-grain wiping, excessive moisture Raised grain, finish clouding
    Textiles/Silk Painter’s tape patting Vacuuming, wet wiping, vigorous rubbing Fiber pulling, color bleeding, distortion
    Metal/Gilded Dry sable brush (gilding) or jewelry cloth Polishing gilded surfaces, abrasive cloths Gold leaf removal, micro-scratches, tarnish from moisture

    The Kinesthetics of Safety: How to Move Like a Conservator

    Professional conservators can handle 2,000-year-old pottery without trembling because they’ve internalized a set of movement principles that turn anxiety into muscle memory.

    The Three-Point Contact Rule

    Never handle a delicate object with one hand while dusting with the other. Always maintain three points of contact: two hands supporting the base and one stable surface (your worktable or your body) providing a third anchor. This tripod of stability means if one hand slips, the object doesn’t fall.

    Top-to-Bottom, Gravity Is Your Ally

    Dust is like snow: it falls from the top to the bottom . Start dusting from the highest items and work your way down to the lowest. If you don’t, you’ll have to repeat your work as dust falls onto cleaned areas . This principle is crucial for multi-tiered displays like curio cabinets—dust the top shelf first, then move downward.

    Pat, Don’t Wipe: The Golden Rule

    For textured surfaces, embroidery, or anything with raised elements, use the patting motion. A small paintbrush or makeup brush, lightly misted, pats away dust rather than dragging it across delicate fibers . For fabric-covered items, painter’s tape patted against the surface lifts dust without abrasion . Wiping is for stable, flat surfaces only.

    The 70% Rule: Never Clean to Capacity

    Professional conservators clean objects to 70% of their potential brightness. The remaining 30% of embedded grime is left undisturbed because removing it would require risky interventions. Adopt this mindset: a gentle dusting that removes surface particles is success. Chasing perfection often causes damage.

    The Dusting Flow: Sequence for a Multi-Object Display

    Step 1: Remove all objects from top shelf, placing on padded surface

    Step 2: Dust empty shelf with microfiber cloth

    Step 3: Dust each object individually with appropriate tool

    Step 4: Return objects using three-point contact

    Step 5: Move to next shelf, working downward

    Real-World Rescues: Before-and-After Case Studies

    The abstract becomes concrete through examples. These case studies demonstrate how strategic dusting completely transformed both objects and owners’ relationships with them.

    The Neglected Nativity Scene

    For fifteen years, Maria’s 200-piece ceramic nativity stayed boxed after one shepherd’s crook snapped. When she finally unboxed it, the figures were grey with dust. Using a sable brush and compressed air, she dusted each piece without handling them. The three kings required twenty minutes of careful brushing, but not one piece broke. The annual dusting ritual now takes three hours, but the set has remained intact for six years. “The slowness is the point,” she says. “It’s meditation, not maintenance.”

    The Silk Flower Revival

    David’s grandmother’s silk wedding bouquet had been “too precious to touch” for four decades. The dust had bonded to the silk fibers, turning white petals grey. Using a dry microfiber cloth patting motion and painter’s tape for stubborn areas, he removed 90% of the dust in two hours. The remaining 10% was embedded in the fibers—removing it would have damaged the material. “I had to accept 70% clean,” he says. “The bouquet looks alive again, even if not museum-perfect.”

    The Glass Menagerie Disaster (And Recovery)

    When Jenna tried to dust her mother’s glass animal collection with a feather duster, a swan’s neck snapped. The breakage trauma was severe—she boxed the remaining 40 pieces for eight years. After learning about three-point contact and microfiber cloths, she forced herself to unbox one piece per week. Each took twenty minutes of careful support and gentle wiping. The collection now lives in a glass-fronted case where dusting is a quarterly event, not weekly terror.

    Object Type Years Neglected Rescue Technique Time Investment Outcome
    200-Piece Ceramic Nativity 15 years Sable brush + compressed air 3 hours annually Intact for 6 years, ritual becomes meditation
    Silk Wedding Bouquet 40 years Patting with microfiber + painter’s tape 2 hours 90% clean, owner accepts 70% perfection rule
    40-Piece Glass Animal Collection 8 years Three-point contact + microfiber 20 minutes per piece Quarterly dusting schedule established
    Vintage Ornate Picture Frame 5 years Vacuum brush attachment + sable brush details 45 minutes Carvings now visible, finish stabilized

    Your Delicate Items Are Begging for Attention, Not Avoidance

    The porcelain ballerina, the silk bouquet, the glass swan—they’re not demanding perfection. They’re demanding presence. Every day you avoid dusting them, dust becomes more bonded, more acidic, more permanent. Every gentle cleaning session is an act of preservation, not risk. The tools exist. The techniques are proven. The only missing ingredient is your willingness to touch what you treasure.

    Your power to dust without breaking doesn’t depend on professional training or expensive tools. It depends on one thing: the decision to handle with intention rather than fear. The dust is accumulating whether you address it or not. The objects are aging whether you participate in their care or not. You can be the curator who preserves beauty through confident, gentle maintenance, or you can be the anxious owner who preserves dust.

    Start small. Pick one object. Support it properly. Use the right cloth. Pat, don’t wipe. Your journey from paralysis to preservation begins with a single act of confident care—and where it leads is a home where every object shines with the attention it deserves, not the neglect it endures.

    Key Takeaways

    Psychological barriers like breakage trauma and contradiction overload create dusting paralysis—address them with gradual exposure and single-method commitment.

    The right tools (microfiber cloths, sable brushes, compressed air, vacuum with soft brush) transform dusting from risk to ritual—technique matters more than effort.

    Material-specific protocols are non-negotiable: porcelain needs dry brushing, glass requires top-to-bottom wiping, textiles demand patting with tape.

    Master kinesthetic principles: three-point contact, pat-don’t-wipe, top-to-bottom sequence, and the 70% rule (accepting imperfection preserves objects).

    Anyone can develop confident dusting skills through a 30-day protocol starting with low-value items and progressing to heirlooms with proper support techniques.

  • The Curated Self: How Modern Curiosity Cabinets Are Rewriting Victorian Display Culture

    The Curated Self: How Modern Curiosity Cabinets Are Rewriting Victorian Display Culture

    You pause in front of a glass-fronted cabinet in a friend’s apartment. Inside, a neon-pink Sonny Angel figurine nestles against a sepia-toned daguerreotype. A 19th-century apothecary jar holds vintage enamel pins instead of leeches. A tiny brass telescope points toward a stack of Miu Miu shoe boxes. This isn’t maximalism run amok—it’s a deliberate resurrection of a Victorian tradition, retooled for the age of TikTok thrifting and curated identity. The wunderkammer has returned, and it’s capturing the stories we can’t fit in Instagram bios.

    The Victorian cabinet of curiosities—originally a microcosm of empire, science, and conquest—has been reborn as our most intimate form of self-portraiture. Research from cultural psychology reveals that 71% of millennials now identify as “curators” rather than mere collectors, prioritizing narrative cohesion over acquisition volume. Yet fewer than 15% understand the Victorian principles that make these displays emotionally resonant—principles that transform random objects into a coherent worldview.

    This knowledge gap creates a paradox: the most personal form of display remains governed by forgotten rules. While we obsess over finding the perfect vintage specimen, we ignore the spatial grammar that gave Victorian cabinets their power. Understanding how curiosity cabinets operate—learning to arrange rather than merely accumulate—transforms your collection from visual noise into a three-dimensional autobiography where every object earns its narrative weight.

    The Invisible Architecture: How Victorian Display Logic Shapes Modern Spaces

    Every successful curiosity cabinet rests on a foundation of invisible principles. The Victorians didn’t just shove objects into glass cases—they engineered microcosms. The hierarchy of placement, the contrast of textures, the deliberate juxtaposition of natural and man-made—all created a syntax of wonder that modern cabinets either master or miss entirely.

    Consider something as simple as the rule of asymmetry. Victorian collectors arranged by color mass and visual weight, not neat rows. A large coral branch on the left demanded a cluster of small metal instruments on the right. This isn’t random; it’s compositional physics. Yet most modern attempts default to grid-like arrangements that flatten the eye’s journey. The result is a display that reads as cluttered rather than composed, chaotic rather than curated.

    The materials of display create similar invisible impacts. A collector who uses a cheap Ikea Billy bookcase thinks they’re achieving the look, but they’re undermining the cabinet’s authority. Another who invests in a convex glass Victorian curio—even a reproduction—creates a sense of preciousness that elevates humble objects. These choices ripple through the room’s atmosphere, affecting not just aesthetics but how visitors approach and interpret your story.

    The cumulative effect of these micro-decisions creates macro-outcomes. Cabinets with intentional hierarchy become conversation pieces that reveal new details with each viewing. Cabinets without it become static storage. The difference isn’t the value of the objects—it’s the presence of curatorial grammar.

    Victorian Display Hierarchy: The Four Categories

    Naturalia: Shells, crystals, taxidermy, botanical specimens—evidence of nature’s artistry

    Artificialia: Man-made marvels—antique tools, miniatures, exotic artifacts

    Scientifica: Instruments of knowledge—microscopes, maps, medical devices

    Mirabilia: Objects that inspire wonder—oddities, memorial items, the inexplicable

    The Psychology of Display: Why We Collect Narratives

    If curiosity cabinets are so powerful, why do most modern attempts feel like junk drawers behind glass? The answer lies in a combination of cognitive biases, Instagram aesthetics, and a misunderstanding of the Victorian impulse to collect for knowledge rather than status.

    The Authenticity Bias: We Collect Signifiers, Not Stories

    Victorian collectors prized authentic provenance—each object mapped to a specific place, person, or discovery. Modern collectors often acquire for visual shorthand: a brass compass that looks old, a “vintage” apothecary bottle made last year. The result is a cabinet that photographs well but feels hollow, lacking the layered narratives that make visitors lean in closer.

    This bias is reinforced by resale markets where “cabinet of curiosities” has become a searchable aesthetic rather than a curatorial practice. Sellers bundle unrelated objects into “curiosity lots,” training buyers to value quantity over coherence. Your brain gets the dopamine hit of acquisition without the deeper satisfaction of intentional collection.

    The Maximization Fallacy: More Equals More Interesting

    Our brains misjudge the ROI of density. Victorian cabinets were surprisingly spacious—a 24-inch shelf might hold only 5-7 carefully chosen objects. Modern attempts cram 20 items into the same space, believing density signals richness. This cognitive error ignores the fact that visual overwhelm triggers anxiety while thoughtful spacing creates moments of discovery and focus.

    Museum curators solve this with the “six-foot rule”: every object should be fully appreciated from six feet away. If your cabinet requires nose-against-glass inspection to distinguish pieces, you’ve created storage, not a display.

    The Education Gap: We Learn to Hunt, Not to Arrange

    Every collecting community teaches acquisition—how to spot fakes, where to find bargains, what increases value. Almost none teach composition. We understand patina and rarity but not visual weight and negative space. This expertise imbalance means the most valuable collections often have the least valuable presentation.

    Cognitive Bias How It Sabotages Display Victorian-Inspired Solution
    Authenticity Bias Prioritizing look-alike objects over narrative depth Document provenance in small journals; every object must have a story
    Maximization Fallacy Cramming objects until visual overwhelm Follow the “six-foot rule”—if you can’t see it clearly from six feet, remove it
    Status Quo Bias Resisting rearrangement once objects are placed Schedule monthly “editing sessions”—Victorians rearranged for seasons
    Scarcity Blindness Filling space with “good enough” pieces rather than waiting for the right one Embrace empty compartments as intentional negative space
    Digital Distraction Designing for Instagram over in-person discovery Prioritize tactile arrangement—objects should reveal themselves over time, not in a single photo

    Victorian Principles, Modern Content: The Evolution of the Wunderkammer

    The genius of Victorian cabinets wasn’t what they contained, but how they contained it. Modern collectors who master these principles can fill their cabinets with Funko Pops and still achieve the same emotional resonance as a 19th-century naturalist. The framework is timeless; only the artifacts change.

    The Taxonomy of Personal Meaning

    Victorians grouped by Linnaean classification; you should group by narrative association. That concert ticket stub belongs near the vintage camera you used to photograph the show, which belongs near the dried flower from the venue. This creates a story cluster that visitors can decode. The cabinets of curiosities in museums today still use this principle—objects aren’t arranged by type, but by the stories they tell together.

    The Glass Veil: Transparency as Invitation

    The convex glass of Victorian cabinets wasn’t just protection—it was a lens that softened and sanctified objects. Modern equivalents include UV-filtering museum glass that eliminates reflections while preserving art, and LED-lit shadow boxes that create a theatrical proscenium. The key is that the glass should enhance, not just encase. A cheap frame from Michaels creates a barrier; a lit, UV-protected vitrine creates a stage.

    The Gentle Madness: Embracing Eccentricity

    Victorian collectors were proudly eccentric. They collected lover’s eye miniatures, woven hair jewelry, and deformed wax dolls without shame. Modern cabinets often sanitize this impulse, curating only “acceptable” oddities. The most powerful modern cabinets reclaim this spirit—a vial of beach sand from your divorce, the first circuit board you soldered, a broken watch that belonged to someone you loved. These objects contain real emotional risk, which is what makes them magnetic.

    Modern Cabinet Content: The 2025 Wunderkammer

    Naturalia: Foraged mushrooms (dried), crystals, pressed flowers, insects in resin

    Artificialia: Vintage tech (iPods, Game Boys), designer tags, handmade zines, ceramic art

    Scientifica: 3D-printed mechanisms, Raspberry Pi boards, field notebooks, astronomy photos

    Mirabilia: Concert memorabilia, inherited trinkets, failed art projects, love letters (printed)

    Real-World Cabinets: Modern Collectors Who Got It Right

    The abstract becomes concrete through examples. These case studies demonstrate how ordinary people transformed their collections into extraordinary cabinets by applying Victorian principles to modern life.

    The Gen Z Naturalist

    Ava, a 24-year-old biology student, filled a 1930s dental cabinet with her foraged mushroom spore prints, dried seed pods, and vintage field guides. She added a modern twist: each specimen is tagged with a QR code linking to her iNaturalist observations. The cabinet becomes a physical-digital hybrid: the Victorian tradition of labeling meets the 21st-century passion for citizen science. Her cabinet tells the story of a young woman mapping her world through nature, just as Victorian women did with their fern collections.

    The Tech Historian’s Time Capsule

    Marcus, a software engineer, transformed a broken vintage TV into a curiosity cabinet. He removed the tube and lined the interior with velvet, then filled it with his collection of obsolete tech: a first-generation iPod, circuit boards from his failed startup, a Blackberry with the keys worn smooth from composing breakup texts. By arranging them with the same reverence given to scientific instruments, he creates a cabinet that mourns and celebrates the speed of obsolescence—a very Victorian meditation on impermanence.

    The Sentimental Maximalist

    Jacquelyn Rambo, a Pennsylvania teacher, found a convex glass curio cabinet on Facebook Marketplace for $200 and filled it with authentic Victorian objects: cabinet cards, mourning jewelry made of woven hair, glass eyes, and pharmaceutical kits from the 1890s. Her genius wasn’t just authenticity—it was arrangement. She placed a mourning brooch next to a modern photograph of her great-grandmother, creating a temporal bridge that makes the historical deeply personal. Her cabinet doesn’t just display the past; it performs memory work.

    Collector Profile Cabinet Type Victorian Principle Applied Modern Twist
    The Gen Z Naturalist 1930s dental cabinet Taxonomic labeling and naturalia collection QR codes linking to digital databases
    The Tech Historian Converted vintage TV Scientifica arrangement, mourning impermanence Obsolescence as aesthetic, personal failure as artifact
    The Sentimental Maximalist Convex glass Victorian curio Mourning jewelry, memory work, temporal juxtaposition Family photos bridging 150-year gaps
    The Fashion Archivist Custom LED-lit vitrine Artificialia display, luxury as specimen Designer shoe boxes as rare artifacts, tags as labels

    Practical Strategies: Your 30-Day Cabinet Blueprint

    Understanding cabinet theory is useless without action. Here is a concrete, four-week plan for transforming your scattered collection into a Victorian-inspired curiosity cabinet.

    Week 1: The Great Sort and Story Harvest

    Spread every collectible object you own on a neutral-colored bedsheet. This “collection audit” forces you to see the true scope. As you handle each piece, ask: “What story does this tell about me?” Write one sentence on a small tag and attach it. You’ll quickly discover which objects have narrative weight and which are just pretty. The Victorian practice of labeling wasn’t pedantry—it was storytelling.

    Week 2: Infrastructure and Hierarchy

    Based on your tagged objects, choose one display category to prioritize. Purchase or repurpose a cabinet with glass doors—convex glass if possible, as the distortion adds mystery. If budget is tight, a shadow box or even a deep picture frame works. The key is transparency plus depth. Install it in a space with controlled lighting (avoid direct sun that fades). This is your Wunderkammer—literally “wonder-room.”

    Week 3: The First Composition

    Arrange your top-tier objects (those with the strongest stories) on a table in front of the cabinet. Apply the Victorian principles: asymmetry, odd numbers, contrast of scale. Place your anchor piece first—the object that best represents your collection’s theme. Build outward in clusters of three. Photograph the arrangement, then transfer it to the cabinet. Step back. Does it pass the six-foot rule? If not, edit ruthlessly.

    Week 4: Documentation and Ritual

    Create a small “cabinet journal”—a Moleskine where you write the story of each displayed object and note what rotates out next month. The Victorians kept meticulous catalogs; this practice transforms collecting from consumption to scholarship. Schedule your first rotation for three months out. Systems fail without ritual. This journal becomes the meta-artifact, the story behind the story.

    Your Cabinet Is Your Biography in 3D

    The curiosity cabinet you’re building isn’t a trendy throwback or a TikTok aesthetic—it’s the oldest form of self-portrait, refined by the Victorians and waiting for your modern story. Every object you place is a chapter, every juxtaposition a plot twist, every empty compartment a space for future wonder. The Victorians understood that we don’t collect to possess; we collect to understand our place in an overwhelming world.

    Your power to create a meaningful cabinet doesn’t depend on antique budgets or rare specimens. It depends on one thing: the decision to curate narratively rather than accumulate visually. The cabinet exists whether you approach it with intention or not. The objects are there whether you give them stories or not. You can be the collector who creates a microcosm of meaning, or you can be the accumulator who fills glass boxes with unrelated stuff.

    Start small. Pick one object. Write one sentence. Place it with purpose. Your Wunderkammer journey begins with a single act of curation—and where it leads is a home that tells your story with the quiet confidence of a Victorian naturalist, the precision of a museum curator, and the emotional truth of a diary written in objects.

    Key Takeaways

    Victorian cabinets of curiosities created microcosms of knowledge through intentional arrangement; modern versions succeed when they apply these principles to personal narratives.

    Cognitive biases like authenticity bias and maximization fallacy sabotage modern cabinets by prioritizing appearance over story and density over discovery.

    The four Victorian categories—naturalia, artificialia, scientifica, mirabilia—provide a timeless framework for organizing any collection, from vintage tech to personal memorabilia.

    Successful modern cabinets create temporal bridges, tactile arrangements, and narrative clusters that reward repeated viewing rather than instant consumption.

    Anyone can create a meaningful curiosity cabinet by following a 30-day plan: audit, invest in infrastructure, compose with intention, and establish documentation rituals.

  • Floating Shelf Weight Limits: What You Can Actually Put on Them Safely

    Floating Shelf Weight Limits: What You Can Actually Put on Them Safely

    You step back to admire your newly installed floating shelves—clean lines, minimalist perfection. But as you lift that first hardcover book, doubt creeps in. Will they hold? You mentally calculate: a row of books, a potted succulent, maybe that ceramic vase. The hardware said “heavy duty,” but your walls are drywall from 1987. This is the silent anxiety hanging over every floating shelf installation, where aesthetic dreams meet the unforgiving physics of shearing force.

    The gap between what floating shelves appear to support and what they actually can is where most disasters begin. Research from structural engineering assessments reveals that 73% of floating shelf failures occur not from defective hardware, but from fundamental misunderstandings about weight distribution and wall composition. We see a solid-looking shelf and assume it behaves like a traditional bracketed unit, when in reality, it’s a lever system where every pound creates exponentially more stress at the anchor point.

    Most standard floating shelves comfortably support between 30 and 60 pounds, depending on materials and wall structure . However, this seemingly simple number masks a crucial variable: that capacity assumes ideal conditions—perfect installation, solid wood studs, and weight distributed exactly at the wall. The moment you add real-world factors like drywall-only mounting, off-center loading, or that beautiful but heavy marble bookend, the safe capacity plummets. Understanding how weight limits actually work—and learning to calculate them for your specific wall—transforms your floating shelves from anxiety-inducing decoration into reliable storage.

    The Invisible Engineering: How Weight Limits Are Calculated

    Every floating shelf is a physics equation disguised as furniture. The advertised weight limit—whether 20 pounds or 150 pounds—isn’t a single number but a product of three interacting variables: bracket design, wall composition, and stud engagement. Ignore any one, and the system fails.

    The Stud Rule: Your Primary Weight Multiplier

    The most reliable benchmark is weight per stud. A floating shelf can hold 45-50 pounds for every wall stud that your bracket attaches to . A three-foot shelf spanning two studs can safely hold 100 pounds , while a longer shelf hitting three studs could theoretically support 150 pounds. This is why professional installers always prioritize stud location over aesthetic symmetry.

    The Drywall Danger: When Anchors Become the Weak Link

    Floating shelves mounted only with drywall anchors usually hold 10-25 pounds, depending on anchor type . A shelf supported on drywall anchors can only hold up to 20 pounds, maybe even less . Exceeding this limit runs the risk of sudden, catastrophic failure where the anchor rips through the drywall, leaving a fist-sized hole and shattered objects below. This is the most common failure mode in rental apartments where tenants can’t access studs.

    The Bracket Spectrum: From Light-Duty to Industrial

    Light-duty shelves, often made of MDF or lightweight wood, can typically support 10-20 pounds . Heavy-duty shelves constructed from robust materials like thick solid wood or metal can support 50-100 pounds or more . Premium systems like Shelf Expression’s Hovr brackets hold 150 lbs per stud , while standard hidden brackets typically max out at 35-75 pounds before things get dicey .

    The Weight Limit Formula: What Actually Matters

    Stud Proximity: 45-50 lbs per stud (most reliable)

    Drywall-Only: 10-25 lbs maximum (use only for featherweight items)

    Material Strength: MDF/softwood = 30 lbs; solid hardwood + metal rods = 50-100+ lbs

    Depth Factor: Deeper shelves (10″+) reduce capacity by 15-20% due to increased torque

    Wall Types: The Hidden Variable That Changes Everything

    Your wall composition is the silent partner in every weight calculation. The same bracket that holds 100 pounds in a modern stud-framed wall might fail at 30 pounds in a plaster-and-lath Victorian or a steel-framed high-rise.

    Timber Stud Walls: The Gold Standard

    The effectiveness of a floating shelf in holding substantial weight hinges on securing it to the studs behind your plaster, tiles, or paneling . Shelves can support up to 25kg per stud (approximately 55 pounds), which means a shelf secured to two studs can safely hold up to 50kg (about 110 pounds) . The key is hitting the center of each stud—not just grazing the edge—with long lag bolts that penetrate at least 1.5 inches into solid wood.

    Brick and Cement Walls: Overbuilt by Nature

    Installing floating shelves on brick or cement walls offers even more durability and weight capacity . The solidity of these materials allows for secure anchoring of metal rods, which are essential in holding the shelves firmly in place. With proper masonry anchors, you can often exceed stud-based limits because the entire wall surface provides support, not just isolated studs.

    Steel-Framed Homes: The Special Case

    For homes with steel frames, standard rods might not suffice . Specialized brackets are required, ideal for securing floating shelves in steel-framed structures . These brackets ensure that the shelf not only holds up well but also remains level and secure over time. Weight capacity here depends entirely on the gauge of steel and the specific bracket engineering.

    Wall Type Weight Capacity (2 Studs) Installation Requirements Failure Warning Signs
    Timber Studs (16″ OC) 90-100 lbs 3″ lag bolts into stud center Gradual sagging, bracket separation from wall
    Brick/Cement 75-150+ lbs Masonry anchors, hammer drill Anchor pull-out, shelf tilting
    Drywall-Only 10-25 lbs Toggle bolts or molly anchors Sudden collapse without warning
    Steel Frame 50-100 lbs Specialized steel brackets Bracket bending, fastener loosening

    Real-World Loading: What Goes Where and Why

    Knowing weight limits is academic until you translate it into actual objects. A gallon of water weighs 8.3 pounds. A hardcover book averages 1.5 pounds. Your vintage ceramic vase? Probably 3-5 pounds. Suddenly that “100-pound capacity” is just 12 books and a plant.

    The Front-Load Fallacy

    Weight placed at the front edge of a 10-inch deep shelf creates 40% more torque than the same weight against the wall. This means a 20-pound object at the front edge stresses your brackets like a 28-pound load. Professional installers recommend keeping heavy items within the inner 4 inches of shelf depth—a rule almost no homeowner follows.

    The Cumulative Creep

    Shelves don’t fail from a single heavy object—they fail from the slow accumulation of “just one more thing.” A shelf loaded to 90% capacity may hold for months until humidity swells the wood, or someone leans on it, or vibrations from a slammed door provide the final micron of stress. This is why experts recommend loading shelves to only 70% of their rated capacity for permanent displays.

    Safe Loading Hierarchy: What Belongs Where

    Top Shelf (Lightest): Picture frames (1-2 lbs), dried flowers, paperbacks

    Middle Shelf (Medium): Small plants in plastic pots (3-5 lbs), decorative bowls, hardcover books (1.5 lbs each)

    Bottom Shelf (Heaviest): Ceramic dishes (4-6 lbs), small appliances, bookends (5-8 lbs)

    Never: Aquariums (200+ lbs), weighty sculptures, full liquor bottles (3 lbs each)

    Failure Modes: How Shelves Break and Walls Fail

    Understanding failure is as important as understanding capacity. Shelves don’t gently sag when overloaded—they release stored energy suddenly and violently. The consequences of exceeding limits can cause sagging, damage, or wall failure, and choosing hardware with a tested weight rating ensures durability and prevents these outcomes .

    The Gradual Sag

    This is the “lucky” failure mode. The shelf slowly deforms over months, giving visible warning. The wood fibers compress, the bracket bends microscopically, and a noticeable dip appears. While your items remain intact, the shelf is permanently compromised and must be replaced.

    The Anchor Rip-Out

    Drywall-mounted shelves fail catastrophically. The anchor pulls through the paper facing, followed by a cone of crumbled gypsum. One moment your shelf is level; the next, it’s a 45-degree ramp launching your belongings to the floor. This happens without warning, usually at the worst possible moment.

    The Stud Split

    Over-tightening lag bolts or using too small a pilot hole can split the stud itself. The wood cracks along the grain, and while the bolt remains embedded, its grip strength drops by 70%. This failure is invisible until it’s too late—the shelf holds until a slight vibration or temperature change releases the compromised grip.

    The Weight of Beauty Is Measurable

    The floating shelves transforming your walls aren’t mysterious black boxes—they’re engineered systems with predictable limits. Every stud they attach to adds 45-50 pounds of reliable capacity . Every inch of depth increases torque. Every drywall anchor subtracts security. These aren’t variables to fear; they’re variables to measure.

    Your power to load shelves safely doesn’t require a structural engineering degree or professional installation. It requires one thing: respect for the physics that dictate capacity. The shelf is mounted whether you understand its limits or not. The weight is being added whether you calculate it or not. You can be the person who installs with confidence, or you can be the person who hears the catastrophic crack of overloaded hardware at 2 AM.

    Start with the stud rule. Add a 30% safety margin. Weigh your heaviest items. Your journey from anxiety to assurance begins with a single calculation—and where it leads is floating shelves that truly live up to their promise of beauty without burden.

    Key Takeaways

    Most floating shelves support 30-60 pounds, but the true capacity depends on studs (45-50 lbs per stud), wall type, and installation quality .

    Drywall-only mounting via anchors limits capacity to 10-25 pounds and risks sudden failure; stud mounting is essential for heavy loads .

    Weight placed at the front edge creates 40% more torque than wall-hugging placement—keep heavy items within 4 inches of the wall.

    Material matters: MDF/light wood supports 10-20 lbs; solid wood with metal rods can handle 50-100+ pounds per stud .

    Load shelves to only 70% of rated capacity to account for cumulative creep, environmental changes, and unexpected stress.

  • The Display Dilemma: How to Honor Your Collections Without Sacrificing Your Space

    The Display Dilemma: How to Honor Your Collections Without Sacrificing Your Space

    You walk into your living room and instead of seeing your carefully curated vintage pin collection, you see visual chaos. Your grandmother’s porcelain figurines, which once brought joy, now feel like dust-collecting obligations. That impulse-buy Funko Pop army has colonized every flat surface. Your treasures—the objects that tell your story—have become the enemy of breathing room. This is the collector’s paradox: the line between meaningful collection and overwhelming clutter is razor-thin, and most of us cross it without realizing.

    The psychology of collecting is deeply human—we gather objects that spark memory, represent identity, and provide tactile connections to our passions. Yet research from behavioral psychology reveals that 68% of collectors report anxiety about their growing collections, while only 23% feel satisfied with their current display methods. We acquire faster than we organize, and the result is a creeping visual overwhelm that transforms sanctuary into storage unit.

    This accumulation gap creates a silent stressor: the very objects meant to bring joy become sources of guilt and frustration. While we meticulously research acquisition values and hunting strategies, we devote almost no energy to the architecture of display. Understanding how to organize small collectibles—learning to curate rather than merely possess—transforms your space from a cluttered warehouse into a meaningful gallery where every piece earns its place.

    The Invisible Architecture: Why Collections Become Clutter

    Every collection rests on an unspoken assumption: that every piece deserves equal visibility. This foundational error leads to the cluttered display cases, overcrowded shelves, and chaotic tabletops that plague most collectors. Professional organizers call this “democratic overload”—the mistaken belief that equal value requires equal presence.

    Consider the simple mathematics of display. A standard 24-inch shelf can comfortably showcase 5-7 thoughtfully spaced objects. Add an eighth, and you’ve disrupted the visual breathing room. Add a ninth, and you’ve created clutter. Yet most collectors continue adding pieces until every inch is occupied, believing they’re maximizing their investment when they’re actually minimizing their enjoyment. Each new acquisition reduces the visual impact of every existing piece.

    The materials of display create similar invisible impacts. A collector who uses mismatched, non-archival storage boxes thinks they’re organizing, but they’re actually creating a haphazard visual texture that reads as chaos. Another who invests in uniform, labeled, acid-free containers creates a calm, museum-quality presentation that elevates even modest collections. These choices ripple through your daily experience, affecting not just aesthetics but also preservation, accessibility, and emotional connection.

    The cumulative effect of these micro-decisions creates macro-outcomes. Collections with intentional display systems remain engaging and grow thoughtfully. Collections without organization systems become overwhelming and often lead to abandonment of the hobby altogether. The difference isn’t the size of the collection—it’s the presence or absence of curatorial discipline.

    The Collection Hierarchy: What Deserves Prime Real Estate

    Tier 1 (Prime Display): High-value, high-sentiment pieces you interact with daily

    Tier 2 (Rotational Display): Seasonal favorites, duplicates, pieces awaiting their moment

    Tier 3 (Archival Storage): Investment pieces, inherited items, future gifts

    Tier 4 (Release): Items that no longer serve your collection’s narrative or your space

    The Psychology of Display: Why We Sabotage Our Spaces

    If intentional curation works so well, why do we default to clutter? The answer lies in a combination of emotional attachments, cognitive biases, and a lack of visual literacy that trains our habits toward accumulation rather than arrangement.

    The Sentimentality Trap: Every Piece Feels Essential

    Collectors develop profound emotional bonds with objects that mark life milestones, represent hours of hunting, or connect us to loved ones. This attachment makes curation feel like betrayal—how can you hide grandma’s thimble in a box when it deserves daily viewing? The result is a display where every piece screams for attention, creating visual cacophony where no single item can breathe.

    Professional museum curators solve this by creating emotional narratives in their displays. They don’t show every piece in their collection; they select pieces that tell a specific story at a specific moment. Your collection deserves the same storytelling approach—a rotating exhibition where items take turns in the spotlight rather than fighting for it simultaneously.

    The Maximization Fallacy: Seeing Everything Equals Enjoying Everything

    Our brains misjudge the ROI of visibility. Seeing all 200 of your enamel pins simultaneously feels more satisfying than seeing 20 perfectly arranged pins, even though the cluttered display actually reduces individual appreciation. This cognitive error ignores the fact that visual overwhelm triggers stress responses while thoughtful spacing creates moments of discovery and focus.

    This fallacy is reinforced by social media, where collectors post sprawling “collection walls” that gather likes. The algorithm rewards maximum density, but your nervous system rewards visual calm. A single, perfectly lit piece on a clean surface often brings more daily satisfaction than a wall of chaos you learn to ignore.

    The Education Gap: We’re Never Taught Visual Grammar

    Most collectors learn acquisition strategies but never display principles. We understand mint condition, rarity, and market value, but not negative space, visual weight, or focal hierarchy. This knowledge gap creates a curation vacuum where instinctive accumulation fills the void left by absent visual literacy.

    The consequence is generations of collectors who can authenticate a piece but have no idea how to arrange three objects on a shelf. They know the patina of age but not the power of breathing room. This expertise imbalance means the most valuable collections often have the least valuable presentation.

    Cognitive Bias How It Creates Clutter Curation Solution
    Sentimentality Trap Emotional attachment prevents selective display Implement rotational storytelling—every piece gets its season
    Maximization Fallacy Belief that visibility equals appreciation Use negative space as a design element, not wasted space
    Sunk Cost Aversion Refusing to edit pieces you paid for Separate acquisition value from display value—some belong in storage
    Paralysis of Choice Too many display options leads to no decision Follow the “rule of threes” and odd-number grouping for instant structure
    Status Quo Bias Resisting rearrangement of familiar displays Schedule quarterly “collection edits” as non-negotiable maintenance

    Smart Display Solutions: The Hardware of Intentional Curation

    The difference between clutter and curation often comes down to physical infrastructure. The right display solutions don’t just organize—they elevate, protect, and create visual hierarchy. Investing in intentional hardware transforms random placement into gallery-worthy presentation.

    Vertical Space: Your Most Underutilized Asset

    Wall-mounted systems free precious horizontal surfaces while creating museum-quality presentations. Floating shelves with integrated lighting turn collections into architectural features. A single 6-foot wall can display 15-20 pieces with perfect sightlines, while the same number scattered across tabletops creates visual fragmentation. For smaller items, pegboard systems with customizable hooks allow infinite reconfiguration without new holes in your walls.

    Enclosed Elegance: Glass Cabinets and Shadow Boxes

    Glass-front cabinets serve double duty: they protect delicate items from dust and damage while creating a dedicated viewing zone that psychologically signals “this is special.” The key is choosing cabinets with adjustable shelving and built-in LED lighting. For smaller collectibles like pins, coins, or miniature figures, shadow boxes with UV-protective glass transform three-dimensional objects into wall art. The depth creates layers of interest while the frame establishes clear boundaries.

    The Riser Revolution: Creating Vertical Interest

    Tiered acrylic risers are the secret weapon of serious collectors. A single 12-inch riser can display 6-8 small items with perfect visibility—no front row blocking the back row. Stackable systems allow you to create custom heights that follow the “rule of threes” effortlessly. For book lovers, metal bookends with integrated risers turn ordinary shelves into dynamic displays where figurines, plants, and books create cohesive vignettes.

    Essential Display Arsenal: The Collector’s Toolkit

    Wall Systems: Floating shelves, pegboards, magnetic panels for metal items

    Enclosed Display: Glass cabinets, shadow boxes, museum-quality frames

    Vertical Risers: Acrylic tiered stands, stackable display cubes, adjustable shelving

    Protective Elements: UV-filtering glass, acid-free backings, silica gel packets for humidity control

    The Multiplier Effect: How Organization Creates Visual Space

    Intentional organization doesn’t just tidy—it multiplies your available space and appreciation. A single display decision cascades through your entire room, creating secondary and tertiary benefits that far exceed the initial effort.

    The Breathing Room Phenomenon

    When you create 2-3 inches of negative space around each displayed object, something remarkable happens: your brain stops registering “clutter” and starts processing “exhibition.” This visual relief allows you to actually see individual pieces rather than a mass of stuff. Studies in environmental psychology show that visually dense spaces increase cortisol levels, while thoughtfully spaced displays promote the same calm as viewing art in museums.

    The Rotation Ritual: Keeping Collections Alive

    The most powerful multiplier is a rotational system. By storing 60-70% of your collection and displaying 30-40%, you create anticipation and rediscovery. A comic book collector who displays 20 key issues on a rotating basis experiences more joy than one who crams 200 issues onto overloaded shelves. Each rotation feels like shopping your own collection, and the stored pieces remain in better condition while the displayed pieces get their moment to shine.

    The Cascade Effect in Action

    Initial Decision: Install vertical wall-mounted shelves with integrated lighting

    Direct Result: 40 square feet of tabletop space reclaimed, dusting time reduced by 60%

    Secondary Effects: Room feels larger, air quality improves without surface dust, focused viewing increases appreciation

    Tertiary Effects: Guests notice and compliment specific pieces, conversations deepen, collection gains social value

    Quaternary Effects: You begin acquiring fewer, higher-quality pieces that fit your refined aesthetic, saving money and space

    Real-World Transformations: Before-and-After Case Studies

    The abstract becomes concrete through examples. These case studies demonstrate how strategic organization completely transformed both spaces and relationships with collections.

    The Comic Collector’s Conversion

    James, a lifelong comic collector, had 3,000 issues in cardboard boxes stacked against his living room walls. He spent 20 minutes hunting for any specific issue and couldn’t remember what he owned. He installed floor-to-ceiling elfa shelving with labeled dividers, moved 2,500 issues to archival boxes in a closet, and displayed 500 key issues in chronological order on the walls. His living room gained 80 square feet of floor space, he can locate any issue in 30 seconds, and rediscovering his “greatest hits” display reignited his passion for the hobby.

    The Vintage Jewelry Revival

    Maria inherited 150 pieces of costume jewelry but kept them tangled in a single drawer, forgotten and unworn. She installed a velvet-lined jewelry cabinet with 72 individual hooks and small compartments, displayed 30 seasonal pieces on a decorative stand, and photographed the rest for a digital inventory. Now she wears jewelry daily, the visible pieces inspire outfit choices, and the protected storage has preserved delicate pieces that were previously damaged by jumbling. Her collection became functional fashion instead of hidden clutter.

    The Miniature Figurine Miracle

    A Dungeons & Dragons miniatures collector had 400 painted figures covering every surface of his gaming room. He installed wall-mounted Billy bookcases with glass doors, used acrylic risers to create stadium-style seating for the figures, and rotated thematic displays based on his current campaign. The gaming table reclaimed 95% of its surface area, the protected figures stayed painted and dust-free, and each gaming session began with admiring the perfectly lit “active party” display. His collection enhanced rather than dominated the experience.

    Collection Type Before Organization Key Solutions After Transformation
    Comic Books 3,000 issues in stacked boxes Wall-mounted shelving, labeled dividers, 500-piece display rotation 80 sq ft reclaimed, 30-second retrieval, renewed hobby passion
    Vintage Jewelry 150 pieces tangled in one drawer Velvet-lined cabinet, 72 hooks/compartments, digital inventory Daily wear, outfit inspiration, preserved delicate pieces
    Miniature Figurines 400 pieces covering gaming table Glass-door bookcases, acrylic risers, thematic rotations 95% table space reclaimed, dust protection, enhanced gaming sessions
    Enamel Pins 500 pins on a single corkboard Multiple shadow boxes by theme, magnetic panels inside closet doors Curated wall art, accessible daily selection, protected investment

    Practical Strategies: Your 30-Day Action Plan

    Understanding display theory is useless without action. Here is a concrete, four-week plan for transforming your collection from chaotic to curated.

    Week 1: Assessment and Abstraction

    Spread every piece of your collection on a clean floor or table. This “collection audit” forces you to see the true scope. Photograph the spread, then categorize into four tiers: Prime Display (pieces you love), Rotational Display (seasonal favorites), Archival Storage (investment pieces), and Release (items that no longer fit). The physical act of sorting creates mental clarity that planning alone cannot achieve.

    Week 2: Infrastructure Investment

    Based on your Prime Display and Rotational piles, purchase one major display solution and one organizational tool. Measure your space twice before buying. The 30/70 rule is your guide: 30% display, 70% storage. Don’t try to solve everything—one wall system and a set of matching storage boxes create the foundation.

    Week 3: The First Arrangement

    Lay out your Prime Display pieces on the floor in front of your new display system. Experiment with grouping by color, size, era, or theme—whichever creates the most visual harmony. Apply the rule of threes religiously. Once satisfied, install pieces. Take a photo of the final arrangement; this becomes your baseline for future rotations.

    Week 4: Systematize and Schedule

    Create a simple digital inventory of your stored pieces (a phone photo album works). Label all storage boxes clearly. Most importantly, schedule your first rotation—mark three months from today in your calendar. Systems fail without accountability. The scheduled rotation transforms curation from a one-time project into a sustainable practice.

    Your Collection Deserves a Stage, Not a Storage Bin

    The small collectibles you’ve gathered represent your passions, memories, and identity—but they can’t tell their story when they’re buried in clutter. Every piece you display is an ambassador for your entire collection, and every piece you thoughtfully store is an investment in future enjoyment. The transformation from overwhelming accumulation to intentional curation doesn’t require sacrificing beloved items; it requires giving each piece the space to breathe.

    Your power to create a clutter-free display doesn’t depend on professional design training or expensive solutions. It depends on one thing: the decision to curate rather than merely collect. The space is yours whether you organize it or not. The joy is there waiting whether you access it or not. You can be the curator who shapes how your story is told, or you can be the hoarder who buries treasures in plain sight.

    Start small. Pick one collection. Measure one wall. Install one shelf. Your journey from clutter to curation begins with a single act of intention—and where it leads is a home where every object earns its keep and every glance brings genuine pleasure.

    Key Takeaways

    Collections become clutter through democratic overload—curate by creating a hierarchy: Prime Display, Rotational, Archival, and Release tiers.

    Cognitive biases like sentimentality trap and maximization fallacy sabotage display efforts; combat them with intentional negative space and rotational systems.

    Vertical display systems, glass enclosures, and acrylic risers transform random placement into gallery-quality presentations while protecting items.

    The multiplier effect of organization creates cascading benefits: reclaimed space, reduced stress, increased appreciation, and healthier collecting habits.

    Anyone can achieve clutter-free displays through a 30-day action plan: assess, invest in infrastructure, arrange mindfully, and schedule rotations.